How to Write Markdown for Blogs and Projects
This guide shows exactly how to write Markdown that renders nicely on this site for both blog posts and project pages. It covers frontmatter, images, headings, links, code blocks, lists, and important limitations.
Note: Place your .md files in the correct directory. The filename (without .md) becomes the slug.
- Blog posts:
app/content/blogs - Project pages:
app/content/projects
Shared authoring rules
Images
This site rewrites relative image paths so you can reference files by filename only, as long as they live in public/images.
- Use
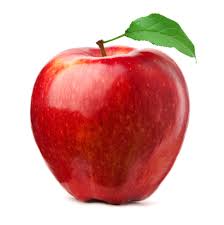
apple.jpegor./apple.jpegand it will render as/images/apple.jpeg. - Absolute URLs, protocol-relative (
//), data URIs, and root-based paths (/images/...) are left as-is. - New: You can specify width and height in the title attribute for responsive images.
Examples:
Tips:
- Put assets in
public/images. - In frontmatter,
image: "apple.jpeg"works the same way as inline images. - Width/height specifications are parsed from the title and added as HTML attributes.
- Supported formats:
300x200,width=300 height=200,width=300,height=200.
Headings and text
H1 heading
H2 heading
H3 heading
Paragraphs support bold, italics, links, and inline code:
- Bold: strong text
- Italic: emphasis
- Link: Go to projects
- Inline code:
pnpm run dev
Code blocks
Fenced code blocks preserve formatting. Add a language hint for syntax color:
export function hello(name: string): string {
  return `Hello, ${name}!`;
}
pnpm install
pnpm run dev
Lists and blockquotes
- Unordered item 1
- Unordered item 2
- Nested bullet
- Ordered item
- Another item
Blockquotes render with a left border and italics.
Limitations
- Tables are not supported by this site’s renderer. Prefer bullet lists to present structured information.
Blog posts
Place files in app/content/blogs. Minimal frontmatter:
---
title: "My First Post"
date: "2025-09-15"
excerpt: "One‑sentence summary that appears in lists and at the top of the post."
tags: ["notes", "demo"]
author: "Your Name"
# image: "hero.jpg"  # optional cover image stored in public/images
---
Content example:
# My First Post
Welcome! This post demonstrates basic formatting.
## Section
Write short paragraphs. Use images from public/images:

Projects
Place files in app/content/projects. Typical frontmatter:
---
title: "Awesome Project"
description: "One-sentence overview of what this project does."
technologies: ["TypeScript", "React", "Tailwind CSS"]
links:
  demo: "https://demo.example.com"
  github: "https://github.com/you/repo"
  live: "https://example.com"
featured: true
date: "2025-07-06"
status: "completed" # one of: completed | in-progress | planned
# image: "screenshot.png" # optional cover image in public/images
---
Field notes:
- description: Shown in the projects list and at the top of the project page.
- technologies: Array of strings rendered as badges.
- links: Any of demo/github/live is optional. Shown as action buttons when present.
- featured: If true, surfaces higher in lists.
- status: One of
completed,in-progress,plannedfor a status badge. - image: Optional cover image; follows the same image rules as blogs.
Suggested body structure:
# Awesome Project
A short lead-in sentence or two.
## Project Overview
What it is and why it exists.
## Features
- Fast
- Accessible
- Easy to deploy
## Tech Stack
- TypeScript, React, Tailwind CSS
## Lessons Learned
Key takeaways from building the project.
## Results
Any impact, numbers, or outcomes.

Checklists before publishing
Blog posts:
- title, date, excerpt, tags, author are present
- Optional cover image placed in
public/imagesand referenced asimage: "filename.ext" - All inline image files exist in
public/images - Readable headings and short paragraphs
Projects:
- title, description, technologies, date, status are present
- Optional links (demo/github/live) added if available
- Optional cover image placed in
public/imagesand referenced asimage: "filename.ext" - Content includes Overview, Features, Tech Stack, and Results/Learnings
Conclusion
You now have a reliable template for writing Markdown for both blogs and projects on this site. Create a new .md in the appropriate directory, add the frontmatter, write your content, and reference images from public/images by filename.